
Mochi Brownies

A luscious crossover of fudgy chocolate brownies and chewy mochi cake — dense, glossy, and delightfully elastic in every bite.

This mochi brownies combination has been a refrigerator-to-table miracle in my kitchen for years. I first stumbled on the idea during a late winter baking session when I had a bag of mochiko sweet rice flour leftover from a dumpling experiment and a craving for something intensely chocolatey. The result was instantly memorable: the outside sets like a brownie with a slightly crackled top and an interior that yields a soft, chewy texture like mochi. It became our go-to dessert for gatherings because it travels well and keeps its texture for a couple of days.
What makes this version special is the balance between deep cocoa flavor and the gentle chew that mochiko provides. The fudgy profile comes from melted butter and a concentrated cocoa base while the sweet rice flour creates a uniquely elastic crumb that clings to your teeth in the best way. I often slice these into small squares to serve after a heavy meal, and even picky eaters who normally skip mochi are always surprised by how much they enjoy these. This recipe produces 12 satisfying pieces and is forgiving enough for bakers of all skill levels.
Why You'll Love This Recipe
- Combines two beloved textures: deep fudgy brownie top and a pleasantly chewy mochi interior that keeps every bite interesting.
- Uses pantry staples like granulated sugar, cocoa powder, and mochiko. No specialty equipment required and easy to scale up for a crowd.
- Make-ahead friendly: these set beautifully and can be stored at room temperature for 2 to 3 days or refrigerated for longer keeping texture intact.
- Ready in about 80 minutes total with only 15 minutes of active prep, perfect for an afternoon bake when you want hands-off oven time.
- Dietary flexibility: naturally gluten-free when you use certified gluten-free mochiko and cocoa. Swaps for plant-based milk work if you need dairy-free options.
My family reaction the first time was priceless. We had friends over and everyone reached for seconds without even asking. Over the years I learned to watch the mochi while it bakes; the ideal visual cue is a set top with a few glossy cracks but still some jiggle in the center. That little wobble tells you the interior will be chewy rather than cake-like.
Ingredients
- Mochiko sweet rice flour: Use 1 cup of mochiko for the signature chew. I prefer Koda Farms brand for consistent texture; sift it to remove lumps and ensure an even crumb.
- Unsweetened cocoa powder: 1/2 cup provides deep chocolate flavor. Dutch-process yields a darker, smoother taste while natural cocoa gives brighter acidity; either works depending on preference.
- Granulated sugar: 1 cup balances the bitter cocoa and tenderizes the mochi interior. For a slightly less sweet result, reduce by 2 tablespoons.
- Baking powder: 1 1/2 teaspoons helps a gentle lift so the top sets and the interior remains chewy rather than dense and flat.
- Unsalted butter: 5 tablespoons, melted and cooled. Butter adds richness and helps create that fudgy mouthfeel. If using salted butter, omit added salt.
- Large eggs: 2 eggs bind and enrich the batter. Use room-temperature eggs so they incorporate smoothly into the melted butter and milk.
- Whole milk: 12 fluid ounces (1 1/2 cups) contributes moisture and tenderness. You can substitute other milks; see substitutions section for notes.
- Vanilla extract: 1 teaspoon for aroma and balance against the cocoa.
- Chopped dark chocolate: 3 tablespoons scattered on top for pockets of melted chocolate and a glossy finish.
Instructions
Preheat and prepare: Preheat your oven to 350 degrees Fahrenheit. Line an 8- by 8-inch baking pan with parchment paper leaving a slight overhang for easy removal. The parchment also helps you lift the set mochi out cleanly for slicing. Mix dry ingredients: In a medium bowl whisk together 1 cup mochiko, 1/2 cup unsweetened cocoa powder, 1 cup granulated sugar and 1 1/2 teaspoons baking powder until uniform. Sifting the cocoa and mochiko gives a finer texture and avoids pockets of cocoa in the finished mochi. Combine wet ingredients: In a large bowl whisk 5 tablespoons melted butter with 2 large eggs, 12 fluid ounces whole milk, and 1 teaspoon vanilla until smooth and free of streaks. Use room-temperature eggs to avoid seizing the melted butter and to achieve a silky emulsion. Bring batter together: Pour the dry ingredients into the wet and fold until evenly blended. The batter will be pourable but thicker than classic brownie batter. Avoid overmixing; stop once the flour is incorporated to preserve a tender but chewy structure. Fill the pan and top: Transfer the batter to the prepared 8- by 8-inch pan, smoothing the surface with a spatula. Sprinkle 3 tablespoons chopped dark chocolate evenly across the top so the pieces melt into glossy pockets while baking. Bake until set: Bake for 60 to 70 minutes. The top should look set and show a few glossy cracks. A toothpick inserted into the center should come out mostly clean with a few moist crumbs, and the center will still have a slight jiggle. If it appears wet and very loose, add 5-minute increments until set. Cool completely before slicing: Remove the mochi from the oven and let it cool to room temperature in the pan. Cooling is crucial because the interior firms as it cools, making clean slices possible. Use the parchment overhang to lift it out before cutting into 12 squares.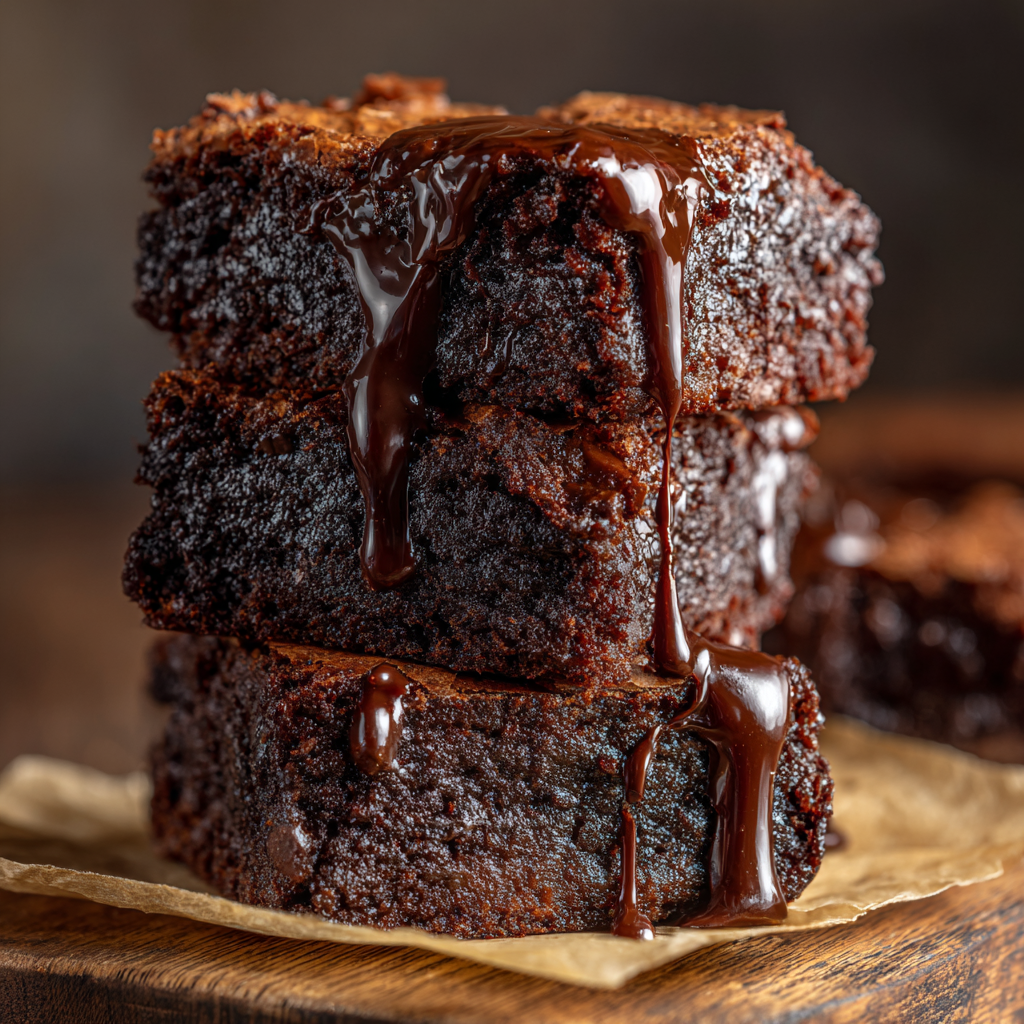
You Must Know
- The finished squares freeze well for up to three months if wrapped tightly and stored in an airtight container. Thaw at room temperature before serving.
- Letting the mochi cool completely is essential; warm mochi is extremely sticky and will not slice cleanly. Chilling briefly in the refrigerator helps if you are in a hurry.
- This version is naturally gluten-free when using certified mochiko and cocoa, but check labels for cross-contamination warnings if you need strict gluten-free assurance.
- Calories and richness vary with milk and chocolate choices; using lower-fat milk or smaller chocolate pieces reduces overall calories and sweetness.
My favorite aspect is how the texture changes as it sits. Fresh from the oven the surface is glossy and a little crisp, then after a day the mochi softens into a perfectly chewy treat that pairs wonderfully with bitter coffee or tea. Friends often ask for the recipe when I bring a pan to gatherings because it stores well and tastes even better the next day.

Storage Tips
Store uneaten pieces in a sealed container at room temperature for 2 to 3 days; they hold their texture well in a cool pantry. For longer storage, refrigerate for up to one week or freeze individual squares by wrapping them tightly in plastic wrap and placing them in a freezer bag. When reheating from frozen, thaw at room temperature and warm briefly in a 300 degrees Fahrenheit oven for 5 to 8 minutes to revive the softened chew and melt any chocolate pockets.
Ingredient Substitutions
If you need dairy-free options, replace whole milk with an equal volume of soy or oat milk and use a vegan butter substitute melted in place of butter. For a less sweet result reduce granulated sugar by 2 tablespoons. Swap dark chocolate for bittersweet chips or white chocolate for a sweeter, creamier contrast. Using natural cocoa instead of Dutch-process will brighten the chocolate flavor and slightly change leavening reaction; if you switch to natural cocoa, consider adding a pinch of baking soda if you want a lift.
Serving Suggestions
Serve small squares at room temperature alongside espresso, black tea, or a scoop of vanilla ice cream for contrast. Garnish with a light dusting of powdered sugar or flaky sea salt for an elevated finish. These work well on dessert platters or individually wrapped as edible gifts. For parties, cut into smaller bite-size pieces and arrange with dried fruit and toasted nuts to balance the chewy-sweet texture.
Cultural Background
Sweet rice flour, commonly called mochiko in English, is a staple in Japanese confectionery where it is used to make mochi and other chewy sweets. This fusion takes inspiration from Japanese textures and pairs them with classic Western chocolate flavors. Over the years, bakers have adapted mochiko into brownies and cakes because its high starch content creates a uniquely elastic crumb unlike wheat-based batters.
Seasonal Adaptations
For autumn, fold in 1/2 teaspoon ground cinnamon and 1/4 teaspoon ground ginger for warm spice notes. In summer, top with chopped roasted strawberries or a sprinkle of citrus zest to brighten the dense chocolate. Holiday versions can include chopped nuts or swirled caramel before baking for a festive twist.
Meal Prep Tips
Make a double batch and bake in two 8- by 8-inch pans; one pan can be shared and the other frozen for later. Label portions and store in single-serve containers for grab-and-go desserts. When preparing for a week of snacks, cut into smaller squares and stack with parchment layers to prevent sticking. Reheat gently for best texture.
Finish by slicing into 12 even pieces with a sharp knife warmed under hot water and wiped dry between cuts. These squares balance ease of preparation with a memorable eating experience. I encourage you to make the recipe your own with different chocolates, milks, and toppings — it rewards experimentation and becomes a household favorite quickly.
Pro Tips
Let the mochi cool completely before slicing to ensure clean edges and the right chewy texture.
Use room-temperature eggs so they emulsify better with melted butter and milk for a silky batter.
Sift mochiko and cocoa powder together to avoid lumps and achieve a finer interior texture.
Warm your knife under hot water and dry it between cuts for tidy slices without tearing the mochi.
This nourishing mochi brownies recipe is sure to be a staple in your kitchen. Enjoy every moist, high protein slice — it is perfect for breakfast or as a wholesome snack any time.
Tags
Mochi Brownies
This Mochi Brownies recipe makes perfectly juicy, tender, and flavorful steak every time! Serve with potatoes and a side salad for an unforgettable dinner in under 30 minutes.
Ingredients
Dry Ingredients
Wet Ingredients
Topping
Instructions
Preheat and line pan
Preheat oven to 350 degrees Fahrenheit and line an 8- by 8-inch baking pan with parchment paper, leaving an overhang for easy removal.
Whisk dry ingredients
In a medium bowl, whisk 1 cup mochiko, 1/2 cup cocoa powder, 1 cup sugar, and 1 1/2 teaspoons baking powder until evenly mixed and sifted.
Combine wet ingredients
In a large bowl, whisk 5 tablespoons melted butter, 2 large eggs, 12 fluid ounces whole milk, and 1 teaspoon vanilla until smooth and no egg streaks remain.
Fold batter
Add the dry ingredients to the wet and mix until evenly blended, stopping as soon as the flour is incorporated to avoid overmixing.
Bake
Pour batter into the prepared pan, sprinkle 3 tablespoons chopped dark chocolate on top, and bake for 60 to 70 minutes until the top is set and a toothpick comes out mostly clean.
Cool and slice
Allow the mochi to cool completely in the pan before lifting on the parchment and slicing into 12 pieces to ensure clean edges and the proper chewy texture.
Last Step: Please leave a rating and comment letting us know how you liked this recipe! This helps our business to thrive and continue providing free, high-quality recipes for you.
Nutrition
Did You Make This?
Leave a comment & rating below or tag
@kitchenfunwithmy3sons on social media!
Categories:
You might also like...

Salted Honey Pie: 5-Star Decadent Twist on a Southern Classic
Silky honey custard in a crisp, buttery crust with a glitter of flaky sea salt. This Southern-inspired sweet-salty pie is elegant, rich, and surprisingly easy.
The Ultimate Creamy Garlic Parmesan Chicken Pasta You’ll Crave Every Week
Juicy chicken, twirly pasta, and a velvety garlic Parmesan sauce come together in 30 minutes for a one-pan weeknight winner the whole family will love.

The Ultimate Creamy Garlic Parmesan Chicken Pasta You’ll Crave Every Week
Juicy chicken and twisted pasta folded into a velvety garlic-Parmesan sauce. Ready in 30 minutes, all in one skillet, and guaranteed to win dinner tonight.
Did You Make This?
Leave a comment & rating below or tag @kitchenfunwithmysons on social media!
Rate This Recipe
Share This Recipe
Enjoyed this recipe? Share it with friends and family, and don't forget to leave a review!
Comments (1)
This recipe looks amazing! Can't wait to try it.
Comments are stored locally in your browser. Server comments are displayed alongside your local comments.
Hi, I'm Melissa!
What's Popular

Get My 30-Minute Meals email series!
Quick and easy dinner ideas delivered to your inbox.