>>
30-MINUTE MEALS! Get the email series now →


A surprisingly easy yet show-stopping Red Velvet Strawberry Cheesecake — creamy cheesecake layered over a red velvet base with bright strawberry topping. Perfect for parties and holidays.
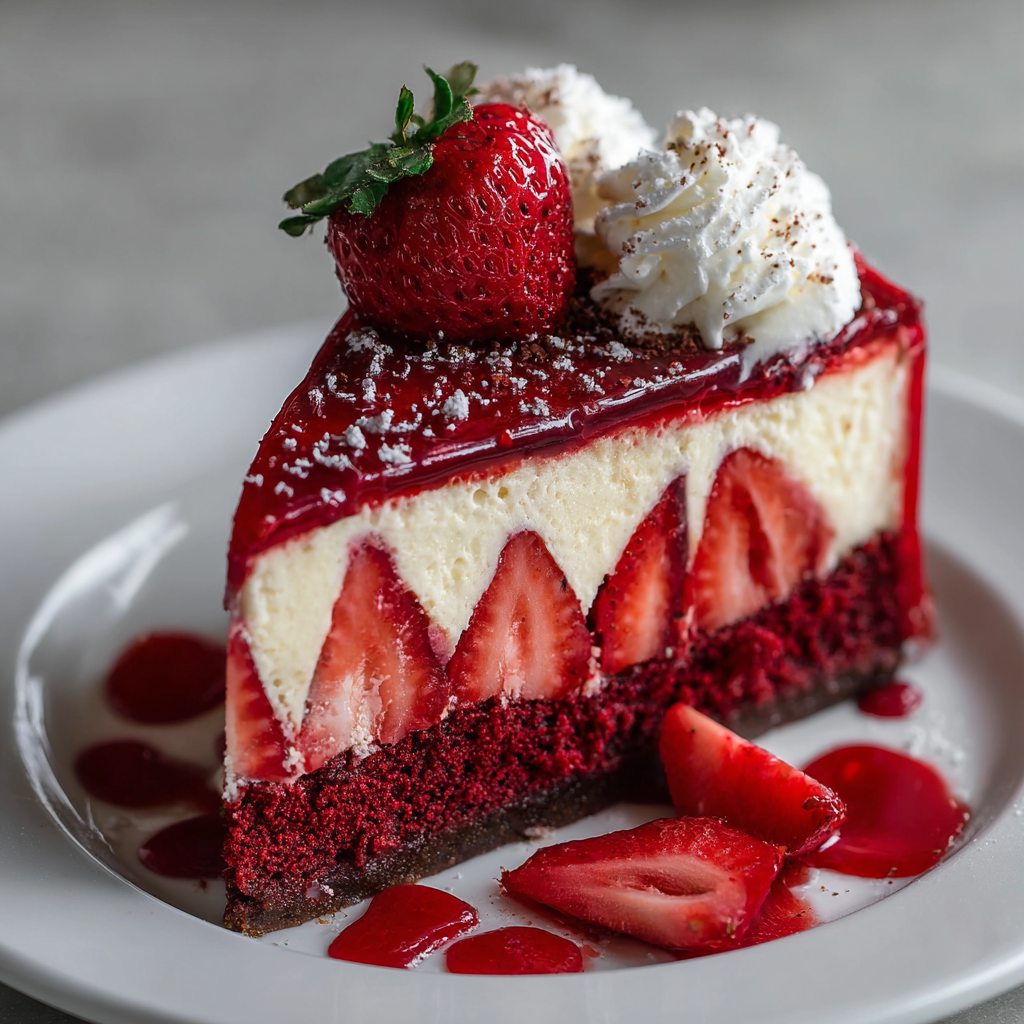
This Red Velvet Strawberry Cheesecake is one of those desserts that feels celebratory the moment you start making it. I first developed this layered version during a summer birthday when I wanted a cake that combined the dramatic color and cocoa whisper of red velvet with the familiar, silky tang of a classic cheesecake. The contrast of a light red velvet base beneath a dense, creamy strawberry-flecked cheesecake layer, finished with a glossy fresh strawberry topping, makes every slice both visually striking and deeply satisfying. The texture balance — tender cake crumb, smooth cheese filling, and juicy fruit — is what keeps people coming back for seconds.
I discovered the combination by accident after experimenting with leftover red velvet batter and a tub of cream cheese from the fridge. Rather than swirl them, I layered — and the result was anything but ordinary. It’s surprisingly approachable: nothing fussy, no special equipment beyond a springform pan and a water bath, and it bakes reliably. Serve it chilled for clean slices and the strawberries at room temperature so their flavor sings. It’s become my go-to for gatherings: guests often ask for the recipe and rarely believe it was easier than it looks.
On the first night I tested this, family members lingered at the table longer than usual. My niece declared it the “best birthday cake ever,” and a friend texted a photo of three empty plates later that evening. I love how a simple shift — layering instead of swirling — makes this dessert feel like an occasion without adding complexity to prep or bake time.

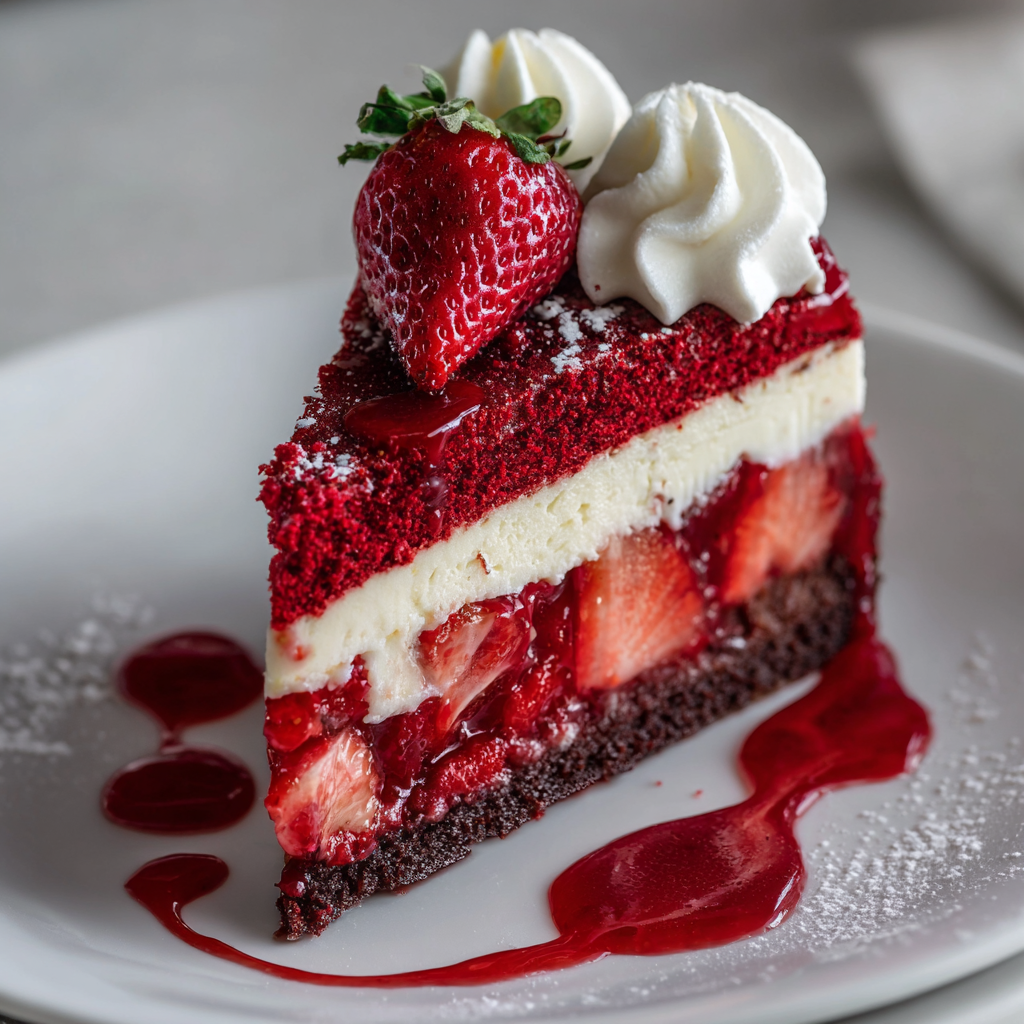
My favorite part about serving this is watching guests’ reactions when they see the deep red base beneath the pale cheesecake and the glossy fruit on top. It has been the centerpiece at summer dinners and winter holidays alike, and the contrast of colors always sparks compliments. The slow cool-in-oven step is a small time investment that prevents cracks and keeps the texture luxuriously smooth.
After chilling, keep the cake lightly covered with a cake dome or loose plastic wrap in the refrigerator for up to four days. For longer storage, slice and freeze individual pieces on a baking sheet, then transfer to a freezer-safe container with parchment between layers to prevent sticking. Thaw overnight in the refrigerator and bring to room temperature for 30 minutes before serving to soften the texture and allow flavors to bloom. If you’ll be transporting the cake, place it on a flat, chilled surface and use a cooler with ice packs for several hours.
If you prefer less red coloring, reduce to 2 teaspoons and increase cocoa by a tablespoon for a subtler hue; gel coloring delivers deeper color with less quantity. Swap the graham crust for a brownie or cookie crumb base — Oreo crumbs work well for a chocolate contrast. For a lighter filling, replace 1/4 cup of cream cheese with mascarpone, which adds silkiness but keeps structure. To make it eggless, use a commercially available egg replacer designed for baking and add a tablespoon of cornstarch to help set the filling, though texture will be slightly different.
Serve chilled slices with a spoonful of macerated strawberries and a dollop of lightly whipped cream or crème fraîche. Garnish with whole berries and a few mint leaves for color contrast. Pair with a lightly roasted coffee or a sparkling rosé that complements the berry flavors. For an elegant presentation, pipe a small rosette of whipped cream on each slice and dust with a pinch of cocoa or freeze-dried strawberry powder for an extra pop of color.
In winter, replace fresh strawberries with a warm compote of spiced cranberries and orange for a festive twist. Summer calls for the brightest berries; use local berries for top flavor. For spring events, garnish with edible flowers like violets or pansies. You can also fold a few chopped roasted cherries into the strawberry topping for late-summer depth. Adjust the sugar in the topping depending on berry sweetness and desired brightness.
Make the crust and base one day ahead and refrigerate. On the day you plan to serve, prepare and bake the cheesecake layer, then chill overnight. Macerate the strawberries a couple hours before serving to allow juices to develop without making the topping watery. Use a warm, clean knife for precise slices; wiping between cuts ensures neat presentation. Pre-slice and plate for large gatherings, or bring the whole springform and slice tableside for drama.
There’s a special satisfaction in serving something that looks like it took hours but feels effortless to prepare. This dessert is a favorite for bringing people together — it’s bold, comforting, and endlessly adaptable. I hope you enjoy making it and that it becomes a staple on your celebration table as it has in mine.
Use room temperature cream cheese and eggs to avoid lumps in the filling and to reduce mixing time.
Wrap the springform pan tightly in heavy-duty foil and check for leaks before placing in the water bath.
Cool the cake slowly by turning the oven off and cracking the door for one hour to prevent cracks.
Run a hot knife under warm water and dry between slices for neat, clean pieces.
This nourishing red velvet strawberry cheesecake recipe is sure to be a staple in your kitchen. Enjoy every moist, high protein slice — it is perfect for breakfast or as a wholesome snack any time.
Yes. Wrap the springform pan very well in heavy-duty foil to prevent water from seeping in during the water bath.
Chill the cake overnight for best texture and cleaner slices; shorter chilling will make cutting more difficult.
This Red Velvet Strawberry Cheesecake recipe makes perfectly juicy, tender, and flavorful steak every time! Serve with potatoes and a side salad for an unforgettable dinner in under 30 minutes.
Preheat oven to 325°F and wrap a 9-inch springform pan in heavy-duty foil. Press graham cracker crumb mixture into the bottom and bake 8 to 10 minutes. Cool completely before adding batters.
Whisk flour, cocoa, baking soda, and salt. Combine sugar, oil, eggs, buttermilk, vanilla, and red food coloring separately, then fold into dry ingredients until just combined.
Beat softened cream cheese until smooth, add sugar, then eggs one at a time. Fold in sour cream, vanilla, and heavy cream until silky and lump-free.
Spread red velvet batter over crust, pour cheesecake batter over it, then set the wrapped pan in a roasting pan and add hot water halfway up the pan sides.
Bake at 325°F for 55 to 65 minutes until center slightly wobbles. Turn oven off, crack door, and cool in oven 1 hour. Remove and chill uncovered for at least 6 hours or overnight.
Combine sliced strawberries, preserves, lemon juice, and powdered sugar. Macerate briefly and spoon over chilled cheesecake before slicing and serving.
Last Step: Please leave a rating and comment letting us know how you liked this recipe! This helps our business to thrive and continue providing free, high-quality recipes for you.
Leave a comment & rating below or tag
@kitchenfunwithmy3sons on social media!

Silky honey custard in a crisp, buttery crust with a glitter of flaky sea salt. This Southern-inspired sweet-salty pie is elegant, rich, and surprisingly easy.
Juicy chicken, twirly pasta, and a velvety garlic Parmesan sauce come together in 30 minutes for a one-pan weeknight winner the whole family will love.

Juicy chicken and twisted pasta folded into a velvety garlic-Parmesan sauce. Ready in 30 minutes, all in one skillet, and guaranteed to win dinner tonight.
Leave a comment & rating below or tag @kitchenfunwithmysons on social media!
Enjoyed this recipe? Share it with friends and family, and don't forget to leave a review!
This recipe looks amazing! Can't wait to try it.
Comments are stored locally in your browser. Server comments are displayed alongside your local comments.
Quick and easy dinner ideas delivered to your inbox.