
The Best Gluten Free Baguettes

These gluten free baguettes have an airy, open crumb and a crisp crust — artisan-style bread you can bake at home and enjoy slathered with butter.

This is the baguette I never thought I would eat again after going gluten-free: crisp, long, and beautifully open-crumbed with just enough chew. I discovered this combination while experimenting with psyllium to improve texture in gluten-free batters, and the moment I pulled the first golden loaves from the oven my kitchen smelled like a French bakery. From the first crackle of the crust to the soft, slightly chewy interior, these loaves capture that classic baguette experience without wheat.
I first made this on a damp Sunday morning when friends popped by for coffee. There’s something unpretentious about a long loaf of bread — it invites conversation, butter, and second helpings. Over a few iterations I refined the hydration, the psyllium gel timing, and the steam method until the crumb opened with generous holes and the crust blistered beautifully. I’ll share the exact steps, tips, and troubleshooting cues so you can recreate those crunchy, glossy loaves at home even if you’ve never handled gluten-free dough before.
Why You'll Love This Recipe
- These loaves deliver an artisan-style crust and open crumb in about 2 hours and 10 minutes total, including proofing — realistic for a weekend bake.
- The ingredient list uses pantry-friendly gluten-free flours and tapioca starch for chew and shine; substitutions are simple and listed below.
- Psyllium husk creates structure and elasticity that mimics gluten, giving a soft interior without gummy texture.
- Steam baking on a hot steel or heavy sheet produces maximum oven spring and the glossy, crackly crust you want.
- Make-ahead friendly: shape ahead and refrigerate for a slow cold proof, or freeze baked loaves for later toasting.
- Perfect for sandwiches, bruschetta, or just buttered hot out of the oven — crowd-pleasing and allergy-conscious.
In my kitchen this loaf became the unofficial star: family and visitors instantly recognized the difference. The first time I served it with salted butter and a bowl of warming soup, my partner declared it “indistinguishable from the real thing,” which is high praise in our house. There’s a little magic in getting a crisp crust and airy crumb from gluten-free ingredients, and that discovery changed how I approach bread baking.
Ingredients
- Psyllium husk (whole/rough): 5 tablespoons. Psyllium forms a gel that traps air and gives structure—don’t substitute this or the crumb will be dense. If you use psyllium husk powder, use about 4 tablespoons instead.
- Warm water: 2 cups (about 16 fl oz). Use lukewarm, around 95–105°F, to help yeast activate; tap temperature matters for yeast performance.
- Tapioca starch: 1 1/2 cups plus 1 tablespoon. Provides chew and a glossy crumb; arrowroot or cornstarch can substitute by equal weight but tapioca gives the best spring.
- Millet flour: 1 1/3 cups, plus extra for dusting. Finely milled millet has a neutral flavor and helps open the crumb; brown rice flour can be used in the same weight for a milder grain profile.
- Sorghum flour: 1/3 cup plus 2 tablespoons. Adds a light, slightly sweet, wheat-like flavor—white teff or light buckwheat are fine alternatives if you prefer.
- Sugar: 2 tablespoons. Feeds the yeast and promotes browning; you may use honey or maple syrup for a different flavor profile, but reduce liquid slightly if substituting liquid sweeteners.
- Salt: 2 teaspoons. Balances flavor and strengthens dough structure; use fine sea salt or kosher salt (measure by weight if possible).
- Instant yeast: 2 teaspoons (or 8 g active dry yeast if activating first). Instant yeast can be mixed directly into dry ingredients for convenience.
- Olive oil: 1 1/2 tablespoons. Adds tenderness and improves crust color;
- Apple cider vinegar: 2 teaspoons. A small acid addition helps with gluten-free crumb structure and flavor depth.
Instructions
Make the psyllium gel: Combine 5 tablespoons psyllium husk with 2 cups lukewarm water in a bowl. Stir well and allow 30–45 seconds for a thick, jelly-like gel to form. This gel is the backbone of the dough; it traps gas and creates elasticity similar to gluten. Mix dry ingredients: In a large bowl or stand mixer, whisk together 1 1/2 cups + 1 tablespoon tapioca starch, 1 1/3 cups millet flour, 1/3 cup + 2 tablespoons sorghum flour, 2 tablespoons sugar, 2 teaspoons salt, and 2 teaspoons instant yeast. If using active dry yeast, bloom it in 1/2 cup of the water with half the sugar first until frothy, then add. Combine and knead: Make a well in the dry ingredients, add the psyllium gel, 1 1/2 tablespoons olive oil, and 2 teaspoons apple cider vinegar. Mix with the dough hook or a sturdy spatula until the dough comes together and pulls away from the bowl. Knead briefly: scrape the sides, fold, and push until the surface is smooth and uniform. The dough will be soft and slightly tacky to the touch; avoid adding extra flour which can dry the crumb. Divide and pre-shape: Turn dough onto a lightly floured surface and divide into three equal pieces, about 11.5 oz (330 g) each if you weigh them. Give each piece a gentle knead to smooth the surface. Keep portions covered while you work to prevent skinning. Shape the baguettes: Pat each piece into a 6 x 4½ inch rectangle, fold the wide edge over and seal, then roll gently with the palms to about 13–15 inches long, tapering at the ends for a classic baguette shape. Pinch the seam to seal. Aim for even tension across the surface for a tidy rise. Proof: Lightly dust each loaf and place seam-side up into the folds of a floured couche or a large kitchen towel. Cover loosely with plastic wrap and proof in a warm spot for 45–60 minutes until nearly doubled. Proper proofing is essential for oven spring. Oven setup & preheat: Place a baking steel or heavy-duty baking sheet on the middle rack and a metal tray on the bottom rack. Preheat oven to 480°F (250°C) for at least 45 minutes so the steel/sheet is thoroughly hot. This high, consistent heat and preheated surface give the best crust and oven spring. Score and bake: Transfer loaves seam-side down onto parchment on a rimless sheet or peel. Score 3–4 long diagonal slashes at a 45° angle. Slide onto the hot steel, add 4–5 ice cubes to the bottom tray to create steam, and bake at 480°F for 10 minutes. Then vent the oven, remove the bottom tray, reduce temperature to 425°F (220°C) and bake another 15–20 minutes until deep golden brown. Cool: Remove to a wire rack and cool until at least lukewarm before slicing; cooling allows the crumb to set and prevents gummy interior. Leftovers are best toasted the next day.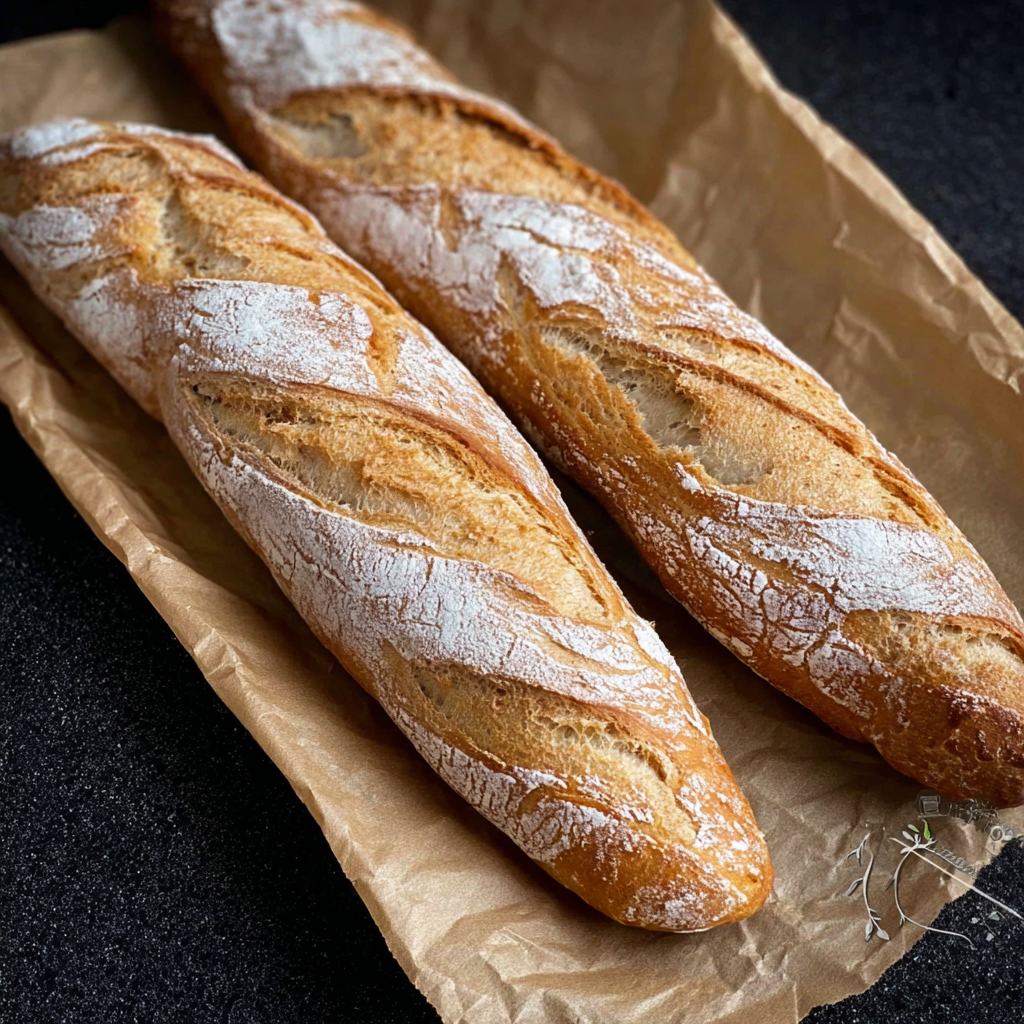
You Must Know
- These loaves are at their peak on the day of baking; keep them in a paper bag or wrapped in a clean towel for up to 3 days. Freeze fully cooled loaves for up to 3 months.
- Psyllium is essential for structure—don’t omit. If substituting the psyllium powder measurement differs (use slightly less powder than whole husk).
- Steam during the first 10 minutes of baking is critical for a glossy crust and good oven spring; use ice cubes on a hot pan to generate steam quickly.
- Use a very hot preheated steel or heavy sheet for the best bottom crust and blistering; light pans won’t produce the same oven spring.
What I love most about this method is how forgiving it is: small temperature or flour swaps rarely ruin the end result, but patience with proofing and a hot oven do make a noticeable difference. Friends who never ate gluten-free bread before tell me they wouldn’t know these loaves were anything but traditional, and that reaction is exactly why I keep making them.
Storage Tips
Store the loaves at room temperature in a paper bag or wrapped in a clean kitchen towel for up to 3 days; this keeps the crust from becoming too soft compared to plastic. For longer storage, slice and freeze the baguette when fully cooled in a heavy-duty freezer bag for up to 3 months — toast or warm straight from frozen in a 350°F oven for 10–12 minutes. Reheating a whole frozen loaf benefits from 10 minutes at 375°F wrapped in foil, then unwrap for a few minutes to crisp the crust.

Ingredient Substitutions
If you don’t have millet flour use finely milled brown rice flour by equal weight for a neutral flavor. Tapioca starch can be swapped for arrowroot or cornstarch by weight, though the crust and chew differ slightly. Sorghum can be replaced with light buckwheat or white teff; oat flour works but only if certified gluten-free and if you tolerate oats. If using active dry yeast, bloom it in 1/2 cup warm water with 1 teaspoon sugar before adding; use 2 1/2 teaspoons active yeast if your packets show older dates for more lift.
Serving Suggestions
Serve warm with salted butter for the classic experience, or slice and use for sandwiches like jambon-beurre or garlic bread. For a rustic appetizer, toast slices and top with marinated tomatoes, ricotta (or plant-based ricotta), and basil. These loaves pair beautifully with soups—think tomato bisque or French onion—because the open crumb soaks up broths without collapsing.
Cultural Background
The baguette is an icon of French baking: long, tapered, with a crisp crust and soft interior. Traditional baguette relies on wheat gluten for structure, so recreating that texture sans-gluten requires different approaches—here, psyllium gel and starchy flours mimic the network that traps gas. This adaptation honors the technique—high heat, steam, shaping and scoring—while using alternative flours common in gluten-free pantries.
Seasonal Adaptations
In spring and summer, fold fresh herbs like chopped rosemary or thyme into the dough for fragrant loaves ideal with grilled vegetables. For autumn, add a tablespoon of pumpkin puree and reduce water slightly for a tender, flavored crumb. Holiday variants can include roasted garlic paste or olives folded into the dough for an aromatic twist that makes a simple loaf feel festive.
Meal Prep Tips
To save time, prepare the psyllium gel and dry mix the night before; store the dry mix in an airtight container. For busy mornings, shape loaves the night before and cold-proof in the fridge overnight—bake from chilled for a later breakfast with minimal morning effort. For portioned meals, slice and freeze individual pieces ready for toast or sandwiches.
These gluten free baguettes celebrate simple ingredients and technique. They’re approachable for home bakers and rewarding for anyone who misses the crackle of a freshly baked loaf. Make a batch, share with friends, and don’t forget the butter.
Pro Tips
Preheat a baking steel or heavy sheet for at least 45 minutes at 480°F to ensure strong oven spring.
Use ice cubes on a hot tray to create steam quickly—do this immediately after sliding the loaves into the oven.
Allow loaves to cool until at least lukewarm before slicing to let the crumb set and avoid a sticky interior.
Keep spare dough pieces covered with a damp towel while shaping to prevent drying.
This nourishing the best gluten free baguettes recipe is sure to be a staple in your kitchen. Enjoy every moist, high protein slice — it is perfect for breakfast or as a wholesome snack any time.
FAQs about Recipes
Can I freeze these baguettes?
Yes. Slice and freeze fully cooled loaves for up to 3 months and toast or reheat from frozen.
What temperature should the water be?
Use lukewarm water around 95–105°F (35–40°C) to help the yeast activate without killing it.
Can I make this without psyllium husk?
Psyllium husk is essential for structure. If you omit it the crumb will be denser and not hold open holes.
Tags
The Best Gluten Free Baguettes
This The Best Gluten Free Baguettes recipe makes perfectly juicy, tender, and flavorful steak every time! Serve with potatoes and a side salad for an unforgettable dinner in under 30 minutes.
Ingredients
Main ingredients
Instructions
Make the psyllium gel
Combine psyllium husk and lukewarm water, stir and let stand 30–45 seconds until a thick gel forms. This will give the dough structure similar to gluten.
Mix dry ingredients
Whisk tapioca starch, millet flour, sorghum flour, sugar, salt and instant yeast together in a large bowl or stand mixer bowl.
Combine and knead
Make a well, add psyllium gel, olive oil and vinegar, then mix and knead until the dough comes away from the bowl and is smooth but slightly tacky.
Divide and pre-shape
Turn out the dough, divide into three equal portions (about 330 g each), and gently smooth each into a tight ball to prepare for shaping.
Shape baguettes
Pat into rectangles, fold and roll into logs about 13–15 inches long, tapering the ends to create classic baguette shapes. Pinch seams to seal.
Proof
Place seam-side up in a floured couche or towel, cover loosely with plastic, and proof in a warm spot for 45–60 minutes until nearly doubled.
Oven setup & preheat
Preheat oven to 480°F with a baking steel or heavy sheet on the middle rack and a metal tray on the bottom rack for at least 45 minutes.
Score and bake with steam
Transfer seam-side down to parchment, score with 3–4 slashes, slide onto the hot steel, add 4–5 ice cubes to the bottom tray for steam, bake 10 minutes at 480°F.
Finish baking and cool
After 10 minutes vent steam and remove bottom tray, reduce oven to 425°F and bake 15–20 minutes until deep golden. Cool on a wire rack until lukewarm before slicing.
Last Step: Please leave a rating and comment letting us know how you liked this recipe! This helps our business to thrive and continue providing free, high-quality recipes for you.
Nutrition
Did You Make This?
Leave a comment & rating below or tag
@kitchenfunwithmy3sons on social media!
Categories:
You might also like...

Salted Honey Pie: 5-Star Decadent Twist on a Southern Classic
Silky honey custard in a crisp, buttery crust with a glitter of flaky sea salt. This Southern-inspired sweet-salty pie is elegant, rich, and surprisingly easy.
The Ultimate Creamy Garlic Parmesan Chicken Pasta You’ll Crave Every Week
Juicy chicken, twirly pasta, and a velvety garlic Parmesan sauce come together in 30 minutes for a one-pan weeknight winner the whole family will love.
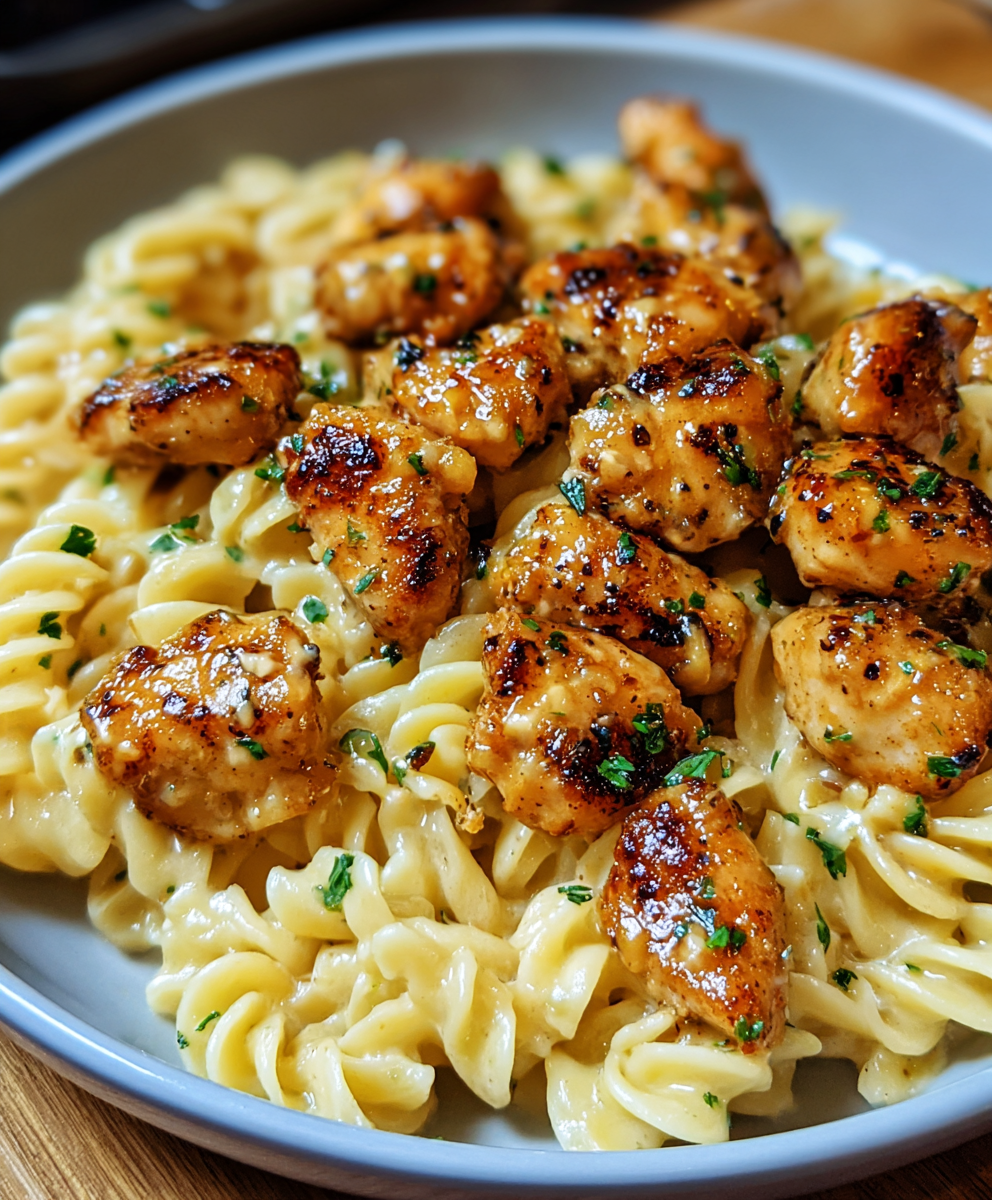
The Ultimate Creamy Garlic Parmesan Chicken Pasta You’ll Crave Every Week
Juicy chicken and twisted pasta folded into a velvety garlic-Parmesan sauce. Ready in 30 minutes, all in one skillet, and guaranteed to win dinner tonight.
Did You Make This?
Leave a comment & rating below or tag @kitchenfunwithmysons on social media!
Rate This Recipe
Share This Recipe
Enjoyed this recipe? Share it with friends and family, and don't forget to leave a review!
Comments (1)
This recipe looks amazing! Can't wait to try it.
Comments are stored locally in your browser. Server comments are displayed alongside your local comments.
Hi, I'm Melissa!
What's Popular
Get My 30-Minute Meals email series!
Quick and easy dinner ideas delivered to your inbox.